Charlotte is turning one in a month (WOW, right?!), and the theme for her birthday party is “Alice in Wonderland.” I’m so excited about this. I have several fun do it yourself projects planned, and I plan on sharing them with you. So, stay tuned for some fun party crafts!
To start us off, what’s a party without some great party hats? We will have two different kinds, in case some of the manly men aren’t into mini hats. The first hat is based on a video on this website. It’s about halfway down, under the title “How to Make a Mini Top Hat Video.”
Mini Mad Hats
I am a crazy person who made 28 of these things, so I had a whole stack of supplies. To make just one hat, you’ll need:
♦ Hot glue (& gun, obviously)
♦ An exacto/craft knife
♦ Scissors
♦ Pencil
♦ Toothpicks
♦ A medium sized Styrofoam cup
♦ A large sheet of foam
♦ Ribbon
♦ Fake flowers, feathers, buttons, or other “flair”
♦ Elastic, more ribbon, or alligator clips
The first time I tried making these hats, I used spray adhesive. That stuff’s expensive, smells bad, and doesn’t really hold on the foam. Stick with hot glue, and work fast so that the cup doesn’t melt.
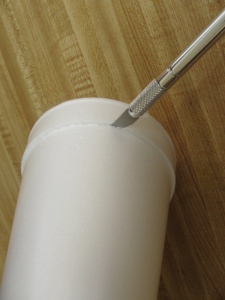
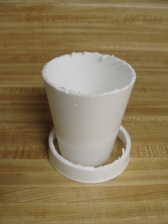
Start by cutting the rim off of the cup with the craft knife. When assembling the hat, you will take the top of the cup and flip it upside down. This gives your hat the taper that makes it mad!
Then, you will need to create four shapes in the foam. First, roll the cup across the foam and cut out a curved shape that fits your cup. Then, cut a long rectangle that’s long enough to wrap the rim of the cup once. You will need two circles – One for each of the “raw” edges. These will form the top of the hat and the flat part that the big part of the hat sits on.


After cutting out all of your parts, glue the cup along the curved shape to cover it. You need to first glue along the edge, press the cup down, roll it across the foam, and then glue the other edge closed. Next, glue an edge of the rectangle down on the rim. Roll the rim along the rectangle and secure the other side. I use clothespins to hold the rim of the hat while it dries. I am wait too impatient to stand there holding it!

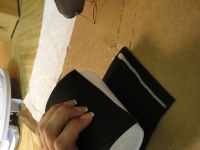
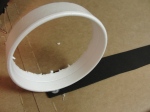

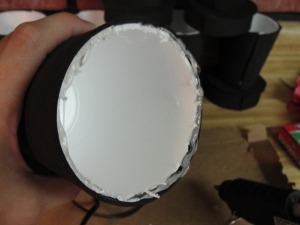
Next, glue your circles on the raw edges. You may need to trim any excess foam off before gluing, to create an even surface. Start by gluing a circle on the “raw” edge of the rim, to create the base of the hat.


After that dries, glue the top of the cup to the top of the base of the hat.


Then, glue the last circle to the other “raw” edge, on the top of the hat.
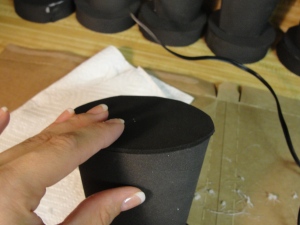
Glue a ribbon, flowers, feathers, buttons, or whatever other “flair” you want. When gluing on the ribbon, attach the ends only with hot glue – Don’t run glue the length of the ribbon. My ribbon ended up a little loose because of the tapered hat. I fixed it by pinching the ribbon before gluing on the flower. If the only flowers that you have are huge, you can easily remove the bottom/outer petals to make them smaller. When gluing on your flair, use a toothpick to push everthing into place. Your fingertips will thank you!
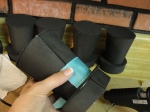


You can then attach elastic, a ribbon, or hair clips. I used alligator clips for my daughter’s hat, so that I can attach it to a crocheted headband. If using alligator clips, they attach better if you first attach ribbon along the clips. If using elastic, 14-15 inches should work for an adult head. Obviously, kids’ heads are smaller. When working with ribbon, I glued on a 19 inch piece of black ribbon to each side. The ribbons will tie together under the chin.
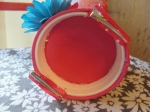

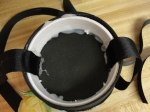
Follow the above steps and – “TaDa!” Instant Mad Hatter Hat.
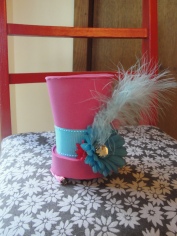
Mad Hats
For the second (“manly”) party hat, I ordered a dozen black hats from the Oriental Trading Company for super cheap. Then, I added a ribbon, flower, and feathers with some hot glue. It was incredibly fast and easy!


Please share any pictures of these hats that you have made – or any variations of them that fit your theme!





Thanks for attending Monday mingle blog hop. I didn’t see where to follow your blog so i decided to follow you via twitter.
Have a great week.
Thanks for checking out my blog, and for the follow!
Crystal
I like your creativity and you did a great job.
I love it! Great JOB!
Following you from Monday Mingle Hop!
Please follow back @ http://ourlittleinspiration.blogspot.com
Thanks,
Angie
Thanks so much!
I’m following you through GFC! Do you also have a Twitter account?
Crystal
I tried to follow you by twitter because I can’t seem to find where to follow you by goggle connect is
Thanks
Angie
WOW! How creative of you!!! Love the hats!
Have a nice day and thanks for stopping by!
Thanks so much!
Crystal
Pingback: Five Tiered Cupcake Stand « sooobig
Pingback: Invitation Artwork « sooobig